Showing posts with label Art lesson. Show all posts

Thursday, February 11, 2016

Art Lesson: Clay Spirit Animal Vessels

This is a lesson I have taught a few different ways, but the way I've done it the past few times seems to be the way to go... for me at least. I usually teach this to 7th graders, but it would work well for other levels as well. I wont go into complete detail, because that's boring. Plus, if you want to use this lesson or send it to someone who does, they will teach it their own way and style anyways. You can translate any of this into almost any material you wanted, especially the first part of the unit, which is 2D instead of 3D.


To start the lesson I introduce the students to the idea of Spirit Animals. We don't go too far down the rabbit hole with this, but keep it light and fun. We actually watch an episode of Rob Dydrek's Fantasy Factory, (Season 1, Episode 2), where he brings in a Shaman to find his Spirit/Power Animal before taking a big rally car jump. Its fun and gets good buy in. I tell the students their homework is to find their spirit animal. They can do this through thought or taking an online test, etc.

Wouldn't this be a great T-shirt?
The next couple days we spend in the computer lab finding images that will help us draw and sculpt the animal. Not only do I encourage them to find images to print on a PowerPoint slide that are realistic and from different angles, but I encourage them to add words to their search to find other versions of their animal that might help them. For example, my animal was a fox. I searched "fox mascot", "fox sculpture", "fox cartoon", and "how to draw a fox". This last search will not only help with drawing, but also with sculpting as the steps can be the same if you translate shapes into forms.

In my latest version of this unit I introduce the kids to Haida Native American art work, especially their work with animals. We discuss symmetry, use of simplified organic and geometric design, hidden faces in the designs, use of common motifs, etc. I then have the students use their research to help them draw out half their animal, fill it in with similar design styles to the Haida (but not direct copies, more focusing on creating geometric and simplified organic designs), and then trace or transfer the half drawing onto the other side of the paper. I allow them to color these in with Sharpies, colored pencils, etc.


Its a good lesson, especially to start a semester. My examples, step by step, are below, but the kids did a lot of great examples... I included a few of those as well.


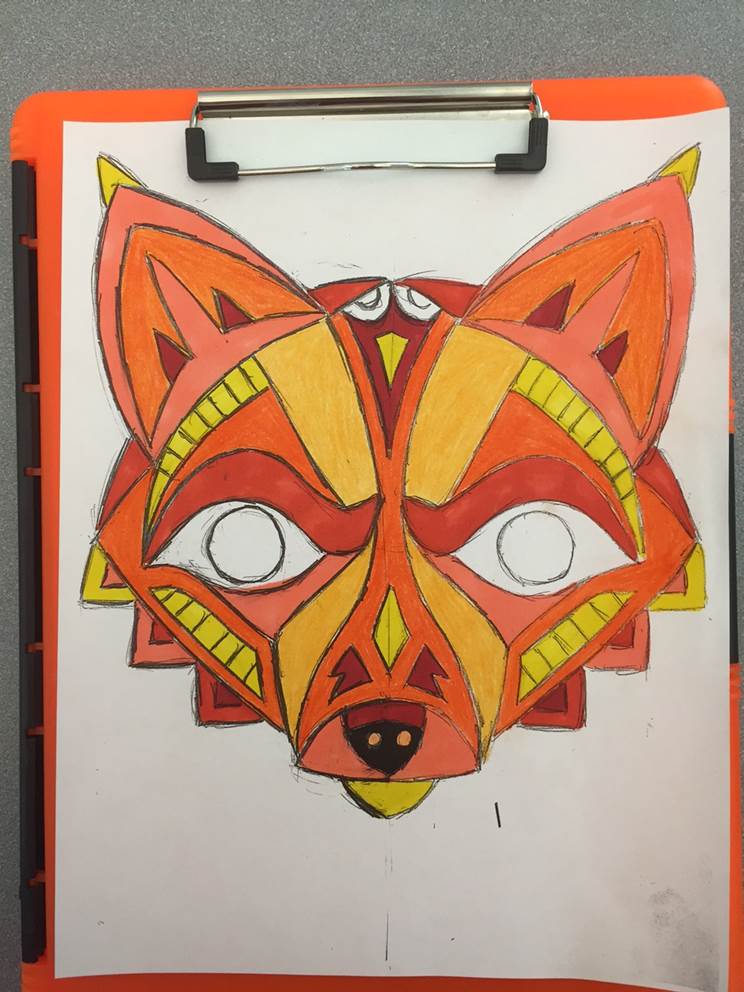


Once this project was over, we revisited the idea of a spirit animal. I then went over the requirements and examples for the next project.... the clay vessel project. This is a long term project that teaches a lot of skills. I come in to this lesson, though, knowing I have taught many of them how to make pinch pots, coils, and use slabs in 6th grade. As I stated earlier, I don't want to get too into details, so I will try to keep these descriptions of what we did simple.

The requirements of this lesson are the following; The vessels must:
  • Be built using pinch pots and coils
  • Have a lid (cut out from vessel)
  • Include additive, subtractive, and incising techniques
  • Include a sculpted animal
Within this structure I do allow quite a bit of freedom, but those are the basic skills I look for. Once we go over these requirements, we spend some time brainstorming as a class. I find it very helpful to show them how to do this. We pick an animal and then make lists or word webs to find ideas and objects we can use in our designs for the vessel.  Then I sketch it out in front of them, tossing around tons of ideas. Once we've done this together, I release them to sketch on their own.

Before we make the project, I spend some time having the students practice. I demonstrate techniques and ideas, then they practice with the clay for the day. One day we use a "how to draw animals" book. I allow a student to choose one and we then all go through the steps all together, sculpting the animal, discussing issues and techniques, etc. I demonstrate this on the projector screen using the document camera while they work on their own versions individually along with me. Another day I demonstrate pinch pots and have them practice these for a day. These are good warm ups, skill builders, and allow them to work free of pressure for a day.

After practicing, we get right into the project. The way I have them build their vessels is a little different, but works really well. BUT, if you want to use this, build them however you want. I have the students start with a pinch pot and build up with coils to desired height and form. Once this is achieved, we create a slab, flip the vessel over, trace the opening onto the slab, and attach it. This is now the bottom. The pinch pot is the top. The reason I do this is it helps later with cutting out the lid. You could just keep the slab on top and cut the lid out. Whatever works better for the students design, really.

The rest of the project is mostly technical details, but below are the individual pages from the packet I hand-made for the students. The first images are the examples I made for this project.If this is helpful to anyone, good. Otherwise, I hope you enjoyed the images.


Tuesday, September 8, 2015

Art Lessons: Using Text with Wayne White

I promise not to turn this blog into an Art teacher blog with lessons and worksheets. But... I will bring up some lesson ideas if they lead to a larger, more interesting conversation. If you are here just for the art lesson ideas, skip towards the bottom.

For the past year or so I have been really interested in using text and words in my work. It started while taking classes for my Masters degree. We were studying the idea of synectics, which is basically combining two things that wouldn't go together. You choose two random words and put them into a "mad lib" type sentence like 'What if ____ were made of ___?" Using two random words you could get "What if elephants were made of hammers?" or something like that. Then you try to illustrate this idea. Its just kind of a fun project, but it got me thinking about words and how to use them in my work.

I had my best friend Steve send me some quotes or writings that I could work with. We have collaborated a lot in the past. He sent me some great stuff and I did my best to incorporate the text into the work. You can see the results below.

These were done with pen and watercolor. Around this same time I stumbled upon Wayne White. His work can be seen in many places, but he is most known for his work on the set of Pee Wee's Playhouse. As of late, he has been working with found paintings from thrift stores and painting words and text onto them, creating very interesting juxtapositions of text, meaning, and context. Below is just one example.

The title of this painting shares a name with the documentary about him called Beauty is Embarrassing. After seeing his work, I started to experiment with my own work. I was inspired by Cy Twombly's abstract lines and shapes and Ed Rusha's work (another artist that uses text and words in his work). Below are a few examples from this series. Each one was about a set of memories like road trips with friends or competitions from my past.


I plan to continue trying out the use of words and imagery. I am not done with the idea and it needs more exploring. 

Art Lesson:
As my interest in text in art grew, it began seeping into my classroom. I now fully embrace the idea and teach it as a lesson. My 8th graders start the year learning how to do graffiti and graffiti design. Its a nice opening lesson. We then move into clay, where they need to use a word or short phrase to inspire their work and must use it somehow in the work. They use slabs and other sculptural techniques to create a scene or diorama based on their ideas. This year, in order to really fire home the message that words have great meaning and weight, we did a short lesson on Wayne White. We looked at his work and then each student was given one example. They then not only came up with what it could mean, but had to come up with a response to the work by creating their own. We used magazines for backgrounds and drew our lettering and words on tagboard. We then cut the words out and glued them down to the background to create the response. Here is the example I made: The first image is by Wayne White. the second is the quick example I made in response. 


This isn't a life changing lesson, but its an interesting one for the for the students. Learning about loaded words, juxtaposition, and responding to another artist's work makes for a great 2-3 day lesson. What's best about this lesson is that I am interested in it. If I am able to teach what I like and what I find valuable and interesting in combination with all the mandated stuff (let's not go there), the lessons will be richer, better, and more interesting for the students.